How to Take a Passport Photo with iPhone: Easy Guide to Perfect Photos
Learnhow to take a passport photo with iPhoneeasily. Follow simple tips to meet requirements and avoid rejection.
Taking a passport photo doesn’t have to be complicated or expensive. With just your iPhone, you can capture a clear, official-ready photo that meets all government requirements.
This guide will teach you how to take a passport photo with iPhone, pick the right background, wear suitable clothes, and stand in the correct position. Use these easy tips to avoid mistakes and make sure your passport photo is accepted the first time, saving you time and hassle.
Part 1: Rules For Passport Photos and Guidelines
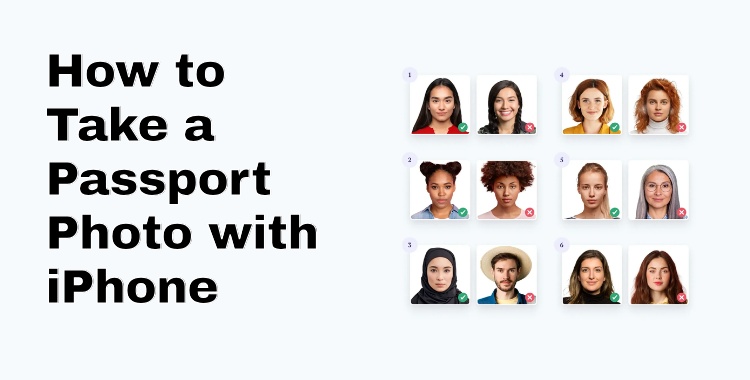
A passport photo must follow strict rules. If even one rule is missed, the photo can be rejected and delay your application. Below are the passport photo guidelines.
-
Photo Size: Standard passport size is usually 2x2 inches (51x51 mm).
-
Background: Use a plain, light-colored background. Avoid patterns or shadows.
-
Face & Expression: Keep a neutral expression, mouth closed, and eyes open.
-
Lighting: Ensure even lighting; avoid shadows on your face or background.
-
Head Position: Center your head and shoulders in the frame.
-
Clothing: Avoid uniforms, hats, or sunglasses. Wear everyday attire.
Part 2: Equipment Needed to Take a Passport Photo at Home
To take a passport photo at home, you only need a few simple items. These basics help you meet official passport photo guidelines and avoid rejection.
Phone or Camera
Use a smartphone with a good camera. An iPhone works well. The photo must be clear and not blurry.
Phone Stand or Support
Use a tripod if you have one. If not, place your phone on a table or shelf. Use the timer so the phone does not shake.
Plain Background
Stand in front of a white or off-white wall. You can also use a white poster board or plain sheet. Make sure there is nothing behind you.
Good Lighting
Natural light is best. Face a window during the day. Avoid strong lights from above that create shadows.
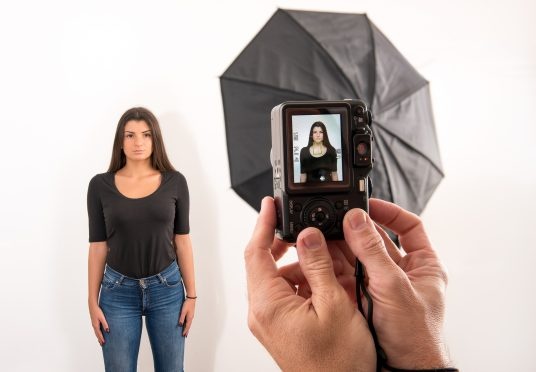
Someone to Take the Photo
Ask another person to take the photo. Selfies are not recommended. The phone should be at your eye level.
Simple Editing App (Optional)
Use a basic app only to crop the photo to passport size. Do not use filters or beauty effects.
Part 3: Step-by-Step Guide to Taking a Passport Photo with iPhone
Step 1: Prepare Your iPhone
Use an iPhone 5 or newer to ensure good image quality. Clean the camera lens and use the rear camera instead of the selfie camera for a more accurate and sharp photo.
Step 2: Ask Someone to Take the Photo
Ask a friend or family member to help you. Selfies are not recommended because they can distort facial features. The person taking the photo should hold the iPhone at your eye level.
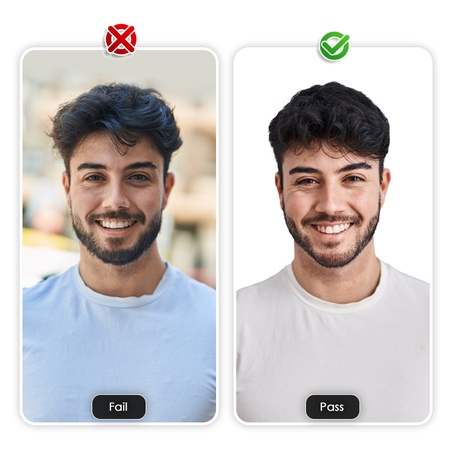
Step 3: Choose a Suitable Background
Stand in front of a plain, light-colored background such as light grey or pale blue. Avoid textured walls, patterns, or objects in the background, as these can cause photo rejection.
Step 4: Set Up Proper Lighting
Choose a well-lit area with natural light, such as standing near a window. Do not stand directly under a light source, as it can create shadows or glare. The light should fall evenly on your face.
Step 5: Stand at the Correct Distance
Stand about 0.5 meters (1.5 feet) away from the background to prevent shadows. The photographer should stand around 1.5 meters (5 feet) away from you to keep your face in focus.
Step 6: Get Your Appearance Right
Face the camera directly with a neutral expression, eyes open, and mouth closed. Remove glasses, hats, and fashion accessories unless they are required for religious or medical reasons.
Step 7: Take the Photo
Open the Camera app and use standard Photo mode. Turn off filters, portrait mode, and live photos. Take several photos to increase your chances of getting a clear and acceptable image.
Step 8: Review the Photo
Check the photo for blur, shadows, or uneven lighting. Your head and shoulders should be visible, and your face should be centered and clearly visible.
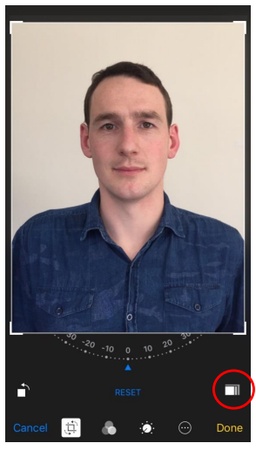
Step 9: Edit Carefully
Open the photo in the Photos app and tap Edit. You may straighten or slightly adjust brightness if needed, but avoid heavy edits, filters, or facial retouching.
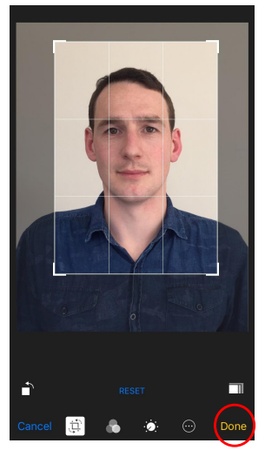
Step 10: Crop to the Required Size
Crop the photo to the required passport format, usually using a 3:4 or square ratio depending on your country’s requirements. Make sure your full head and upper shoulders remain in the frame.
Part 4: Common Mistakes That Lead to Passport Photo Rejection
Many passport applications are delayed because of simple photo mistakes. Knowing these issues in advance can save time and avoid resubmission.
Wrong Background Color or Texture
Using a dark, colorful, or patterned background is a common reason for rejection. The background must be plain and light, with no designs, shadows, or objects visible behind you.
Poor Lighting and Shadows
Photos taken in low light or under strong overhead lighting often create shadows on the face or background. Uneven lighting, glare, or red-eye can make the photo unacceptable.
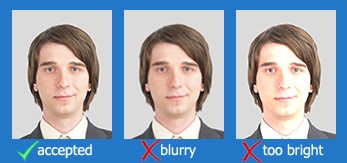
Blurry or Low-Quality Image
A photo that is not sharp, pixelated, or out of focus will be rejected. This usually happens when the camera moves, the lens is dirty, or the image is over-edited.
Incorrect Facial Expression
Smiling, frowning, or tilting the head can cause rejection. Passport photos require a neutral expression, with eyes open and mouth closed.
Wearing Glasses or Accessories
Glasses, sunglasses, hats, or fashion headwear are not allowed in most passport photos. Reflections from glasses or shadows from headwear often lead to rejection unless worn for medical or religious reasons.
Improper Head Position or Size
If the head is too close, too far, or not centered, the photo may not meet official size rules. The full head and upper shoulders must be visible and properly aligned.
Using Filters or Beauty Effects
Any kind of filter, skin smoothing, or beauty enhancement can alter facial features. These edits are not allowed and often result in rejection.
Wrong Photo Size or Cropping
Incorrect dimensions, excessive zoom, or cutting off part of the head can make the photo invalid. Always crop according to official passport photo guidelines.
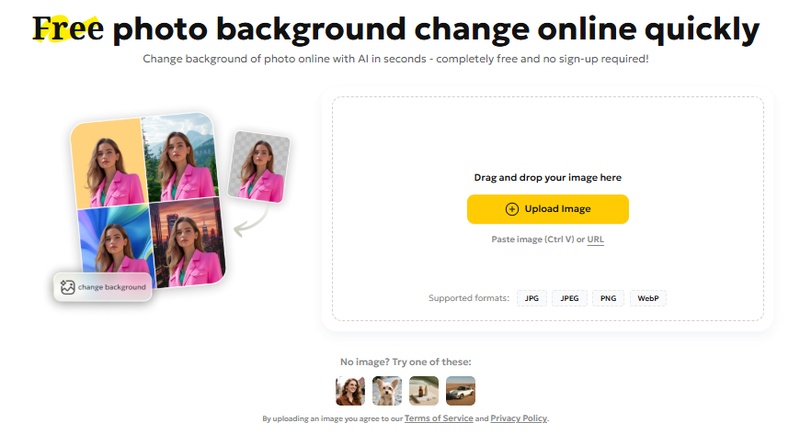
Bonus Tip: PixPretty AI – Smart Photo Editing and Background Removal for Passport Photos
PixPretty AI is a powerful, user-friendly photo editor that helps you remove backgrounds, enhance images, and create professional-quality visuals in seconds. Whether you’re preparing a passport photo, product shot, or social media content, PixPretty AI makes complex editing tasks simple and fast. With millions of users trusting the tool, it’s the perfect solution for both personal and business needs.
Key Features:
-
AI Background Removal: Automatically remove complex backgrounds in seconds.
-
Batch Editing: Edit multiple images at once to save time and effort.
-
Smart Image Resizer: Resize images for eCommerce or social media instantly.
-
AI Portrait Retouching: Enhance facial features naturally and professionally.
-
Custom Background Replacement: Replace removed backgrounds with solid colors, stock images, or your own designs.
-
HEIC to JPEG Conversion: Easily convert your iPhone photos to compatible JPEG format.
-
Image Compression & Optimization: Reduce file size without losing quality.
How to Use PixPretty AI for Passport Photos (Step-by-Step)
Step 1: Upload Your Photo
Choose any photo from your device and upload it to PixPretty AI. The tool supports all major formats.
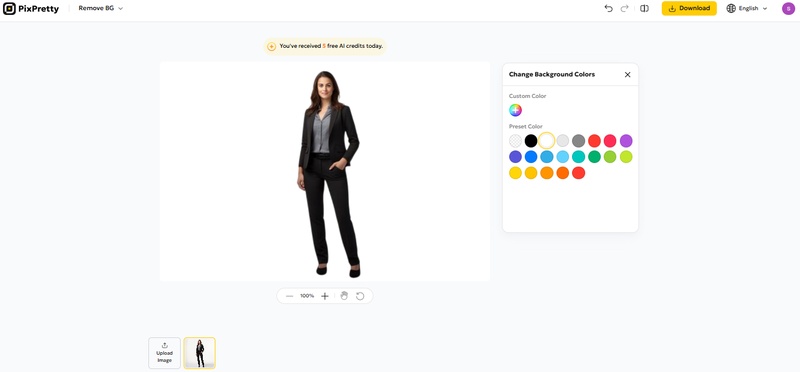
Step 2: Remove & Edit Background
The AI automatically detects the subject and removes the background. You can replace it with a plain white or blue background suitable for passport photos.
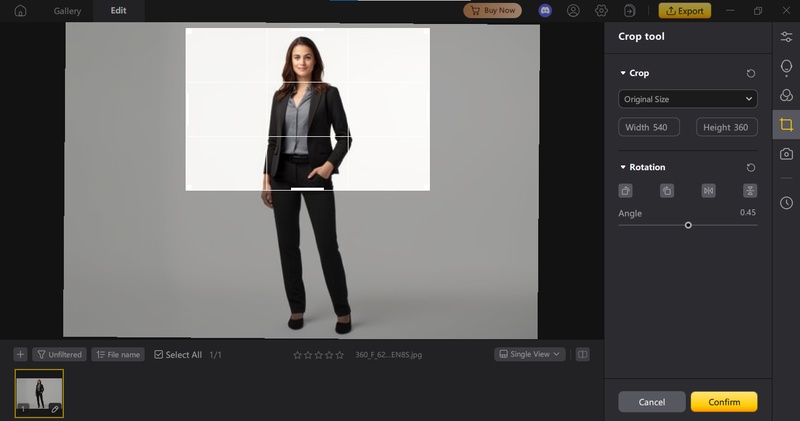
Step 3: Adjust Your Image
Use the editing tools to crop, zoom, or reposition your face. Make sure your head and shoulders fit the correct passport photo dimensions.
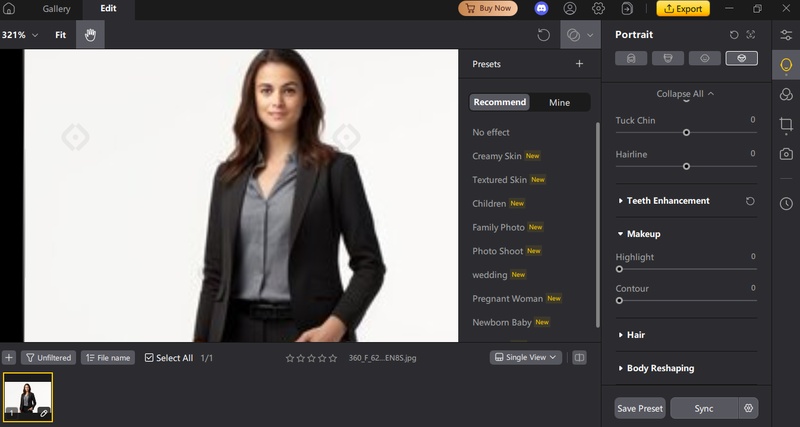
Step 4: Enhance Photo Quality
Optionally, use AI retouching to balance lighting, remove shadows, and sharpen details without altering your natural features.
Step 5: Download Your Final Photo
Once satisfied, download the image in high quality. Your photo is now ready to use digitally or to print for official documents.
Final Words
In this article, we’ve seen how to take a passport photo with iPhone by following the right setup, lighting, and positioning techniques. To make the process even easier and make sure a perfectly compliant photo, you can use PixPretty AI to remove backgrounds, enhance lighting, and refine your image in seconds. Combining your iPhone with PixPretty AI allows you to create a professional, official-ready passport photo quickly and effortlessly, saving time and avoiding common mistakes.