Welcome to PixPretty!
PixPretty is dedicated to providing intelligent imaging solutions for commercial photography. It analyzes each photo smartly to achieve professional-grade post-processing results. We help you manage everything from retouching to image selection and delivery—taking care of all the tedious editing steps for you.
The desktop version currently supports Windows.
Presets are categorized into: Color Presets, Portrait Presets, and Composite Presets.
Color: Presets that apply only to the Color Adjustment module.
Portrait: Presets that apply only to the Portrait Enhancement module.
Composite: Presets that combine multiple modules (Portrait Enhancement, Color Adjustment, Filters).
When editing the same image, if you apply one preset type and then apply another of the same type (including first applying a single preset and then a composite one containing that type), the final result will reflect the last applied preset. However, if the applied presets are of different types, the final result will be a layered combination of all effects.
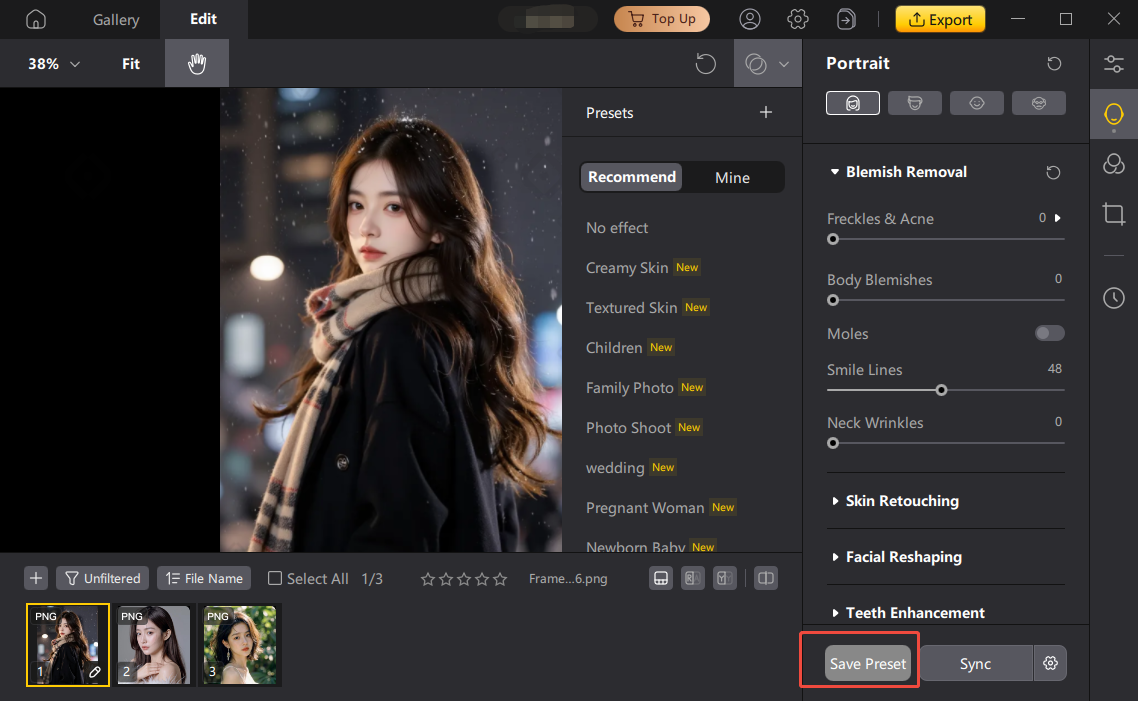
1. After adjusting the parameters for your retouched image, simply click "Save New Preset" at the bottom right of the function panel to create a new preset.

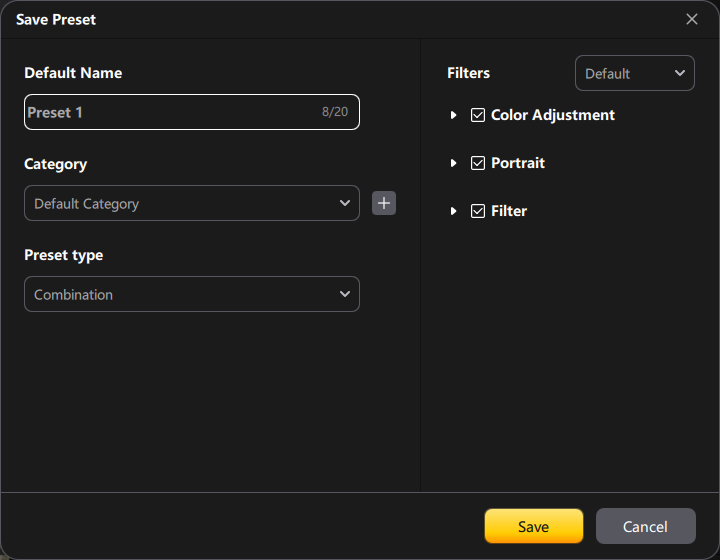
2. After clicking, a "Save Preset" window will pop up. Fill in the settings according to your needs:
Preset Name: Enter a name for your preset.
Preset Category: Select the category where it will be saved. Click the "+" on the right to create a new category.
Preset Type: Choose from Composite, Color, or Portrait.
Filter Options: All filters are selected by default. Adjust as needed.

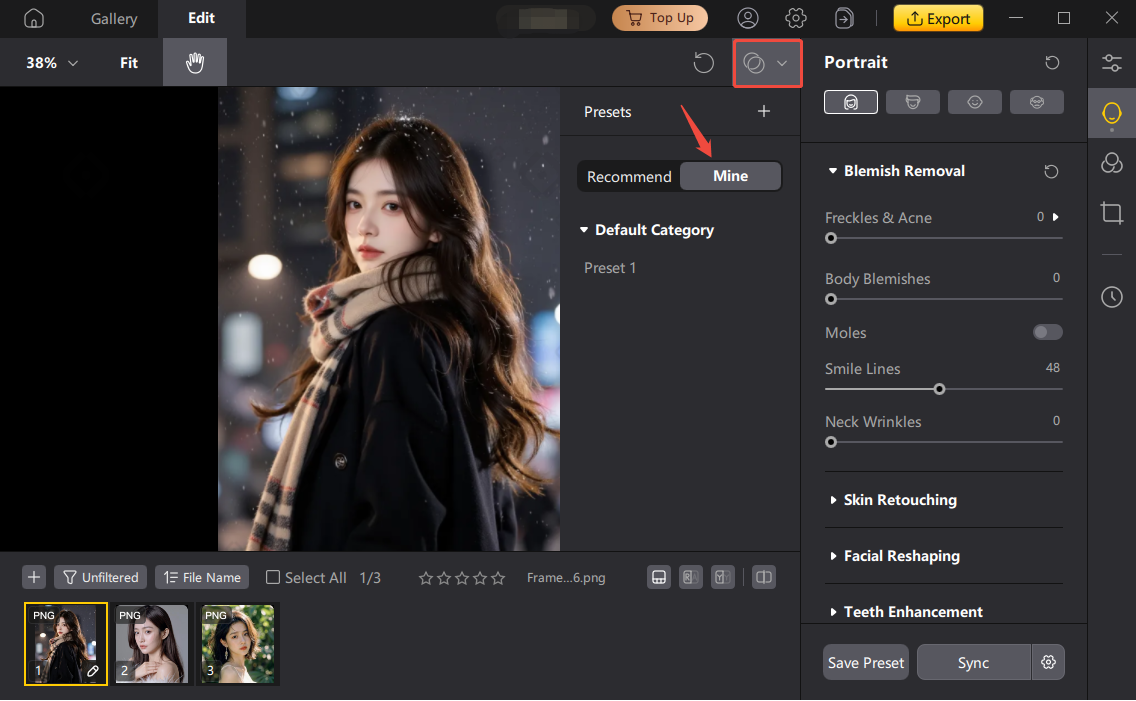
3. After saving, go to the "My Presets" section to view and use it.

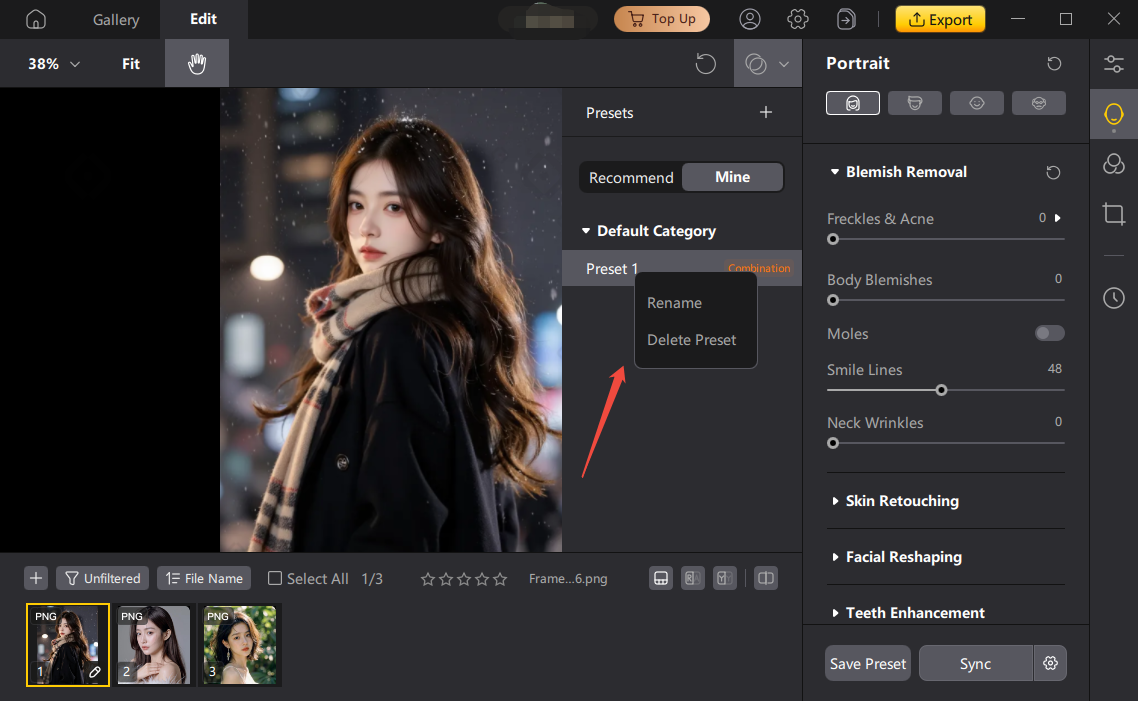
Hover your mouse over the preset you want to edit. Once highlighted, right-click to rename or delete it.

